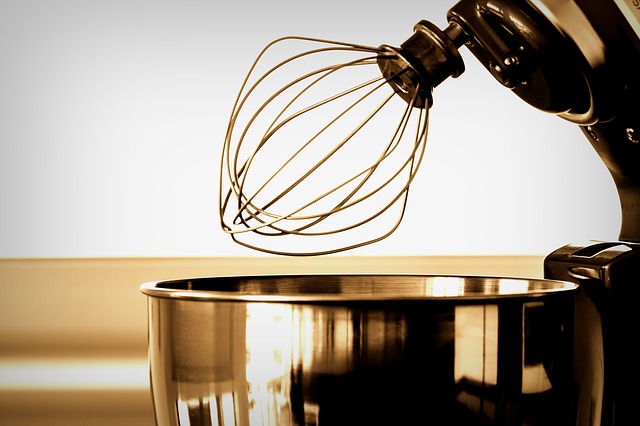
There’s no better way to have fun outdoors together with your family than to enjoy smoked steaks. Smoking gives your meat a burst of yummy flavors. Whether it’s a bachelorette party, a baby shower, or a graduation party, the Masterbuilt electric smoker is the ideal smoker to spice up your events.
How to use a Masterbuilt electric smoker will make you realize how easy it is to use the smoking method of cooking. It may be a hassle at first, but once you get going, there’s no looking back. Now, you can cook your favorite meat recipes without charring or falling apart. Let’s get started!
If you are new to this equipment, you have just landed on the right page. Discover the step-by-step guide on how to smoke your signature dishes.
Step 1: Season, your smoker
Wondering how to set up a Masterbuilt electric smoker? Right! When it comes to setting up a Masterbuilt electric smoker, the method is similar to typical Masterbuilt models. Seasoning a smoker is the first step to unleashing its smoking capabilities.
The main aim of the seasoning process is to burn off any substances present in the smoker at the time of purchase. Such may include oil and dust. Utilize the following Masterbuilt electric smoker instructions:
Instructions
- Remove any water from the pan. Make sure all smoking equipment is in its rightful position.
- Plug the Masterbuilt electric smoker into the nearest socket and power it on.
- Adjust its temperature to 275 degrees Fahrenheit.
- Then set the timer to 3 hours (180 minutes).
- Add half a cup of your preferred wood chips into the loading tray during the last 40-45 minutes to wind up the seasoning process
- Allow the smoker to cool by switching it off once the timer runs down
- You are now ready to use your electric smoker for the first time!
Step 2: Prepare your meat
Remember, the recipe you have in mind plays a significant part in how you prepare your steak. We recommend that you marinate your steak for several hours during the night. This way, your meat will thoroughly soak up the marinade and achieve tasty flavors and aromas.
Step 3: Preheat, your electric smoker
Now that you have the meat that you want to smoke turn on the electric smoker to preheat.
You can add wood chips to the smoker before turning it on.
Consistently add only half a cup of your preferred wood chips, once the previous load stops emitting smoke.
Don’t think about adding foils to the racks to reduce the cleaning time. Doing so will only prevent heat circulation.
Step 4: Set the ideal smoking temperature
The perfect cooking temperature for typical dishes such as fish and meat is 225 degrees Fahrenheit.
Step 5: Add more wood chips and water
You can add more water and wood chips once the smoke ceases.
Never put the wood chips more than the recommended amount of half a cup. It will only serve to ruin your final results.
If you are unsure of how much water to add, peruse your instruction manual such that you refill the water pan appropriately.
The water will turn into steam and will help keep your steak soft and juicy.
Step 6: Add the meat to the electric smoker
It’s about time you place your meat or fish on top of the provided grill trays. Ensure that there’s enough smoke.
Step 7: How to moist your meat
You don’t want your chicken dry and sticky. This is the perfect time to baste it! Foremost, cooking your meat depends on three fundamental factors: its size, thickness, and the optimum temperature to cook it.
For this reason, you need to baste your meat after two-thirds of its cooking time to make it favorably moist.
Step 8: Add more wood chips
The smoking process requires a lot of wood chips, and it’s only feasible to check on them for favorable results. Make sure you only add half a cup.
Whenever you observe the smoke ceasing, add more wood chips. A temperature rise shouldn’t make you sweat. It will eventually return to normal after some time.
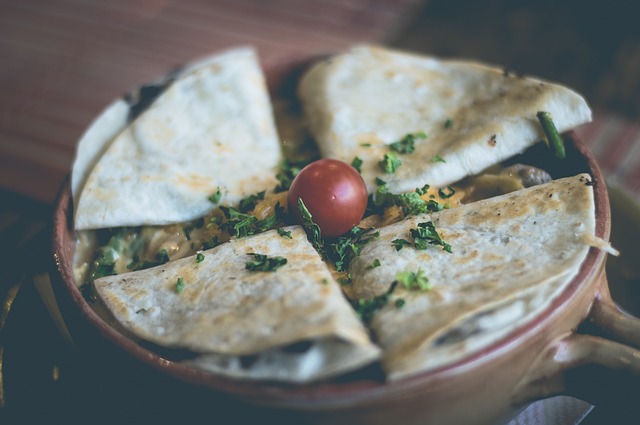
Step 9: Sauce up your steak! (Optional)
Applying a sauce to finish off the basting process can be a great way to spice up your ribs or chicken delicacy. Who wouldn’t want a finger-licking steak?
You can do this by saucing it 45 minutes before taking your meat out of the smoker. Saucing not only enhances the taste of food but also makes it instantly ready to munch!
Step 10: Take the meat out of the smoker and indulge!
Gently eject the meat from the smoker. Your steak is now ready to be enjoyed! Smoking meat in a Masterbuilt electric smoker has never been this convenient. You did it! Before you get going to your barbeque party, turn off your smoker to allow it to cool.
How to Clean Masterbuilt Electric Smoker
The interior chamber is the most vital area of your smoker. You need to clean it as often as you use it. Before cleaning, it is advisable to let it cool off completely. Learning how to clean an electric smoker will ensure that you don’t blow up the circuits or ruin them. Follow the following easy steps:
Easy Steps
- Fetch the main cleaning equipment, which is the smoking rack. Other cleaning essentials will include grate supports, drip, and a water bowl.
- First off, slightly shake the chamber to remove any leftover wood chips and ash. You can also use a bristle brush to remove the debris.
- Wipe off the soft debris stuck on the glass door, meat probe, and walls using a soft damp cloth
- For your safety, ensure the debris cools off first before disposal
- There are no secrets to cleaning the chamber. You have to get to the corners of the smoker.
- Properly wipe off the seal from the inner door. It helps sustain the seal for efficient future use.
How to Use a Masterbuilt Electric Smoker with Woodchips
Getting to learn how to use Masterbuilt smoker wood chips is part science, part art, but essential! You will be a pro in no time if you smoke your favorite dishes repeatedly, using wood chips. Remember, only wood chips can achieve that smoky, wood-fired aroma of a traditionally seasoned flavor.
Step 1: Check for any ventilation leaks
Before you power on your Masterbuilt electric smoker, look for any obstructions to the chamber’s ventilation.
Keeping your smoker outside can result in the warping of rubbers due to constant wear and tear.
A worn-out rubber lining in your chamber will leak valuable smoke, and poor ventilation will derail the combustion process that produces smoke.
Step 2: Add woodchips to the loader
Load half a cup of your preferred wood chips into the tray. You can use the Masterbuilt Smoker’s side loader to eject the tray and fill it.
Step 3: Re-insert the loader into the smoker
Once you adjust your chip tray accordingly, switch the handle to the ‘Unload’ position. It will help the wood chips fall perfectly into the plate, which is located just above the smoker’s heating element.
Step 4: Power on your smoker
Turn on the smoker and set your ideal cooking temperature. Remember to give your smoker a chance to preheat before you place any meat on the grill.
You can preheat for 20-40 minutes, depending on the weather. What’s more, if you have been storing your Masterbuilt smoker in freezing environs, preheating will allow it to attain a stable cooking temperature.
Step 5: Analyze interior temperatures
Once the 20-minute exhaust, it’s time to check the internal temperature of the chamber. Make sure the variance is only +/- 20 degrees Fahrenheit, depending on external conditions such as windiness. Strong winds can blow through the chamber, cooling the preheating temperature.
However, Masterbuilt electric smokers are designed to operate at subzero temperatures. If you still need to ascertain internal temperatures, use an oven-friendly thermometer to have higher accuracy.
Step 5: Add your meat
If you are satisfied with the chamber conditions, it’s time to place your steak on the racks. You can grease the trays beforehand to make cleanup easier for you.
Generally, half a cup of wood chips will last for 2 hours or so. Continue to check your smoke levels without opening the smoker door. Add half a cup of chips every 1-2 hours until your cooking period is completed.
How to Smoke a Brisket in an Electric Smoker
There’s nothing tastier quite like smoked brisket meat! The brisket cut emanates from a cow’s chest and has gained a reputation for being difficult to smoke while keeping it tasty and juicy.
If it’s your first time using a Masterbuilt electric smoker, it is up to you to adhere to every step to obtain the best results. Creating a brisket masterpiece can take a long time to figure out the exact recipe that works for your cut and taste. Here are some hands-on tips that will help you to become a pro quickly.
Step 1: Choose the brisket
The key to good brisket is buying a good meat cut. Pick the brisket and feel it across your hands to ascertain its tenderness. Find a piece of meat that bends a lot and has tender fat marbling.
Step 2: Prepare your brisket
Massage your brisket with a rub of your choice, 2 to 4 hours before smoking it in a Masterbuilt digital electrical smoker.
We recommend that you let the brisket marinade overnight. You can also rub it a day before you smoke it to attain a juicy flavor. Ensure that you rub the entire meat section. Additionally, make sure that you wrap the brisket in aluminum foil before refrigeration.
Step 3: Smoke it
You should remove your brisket from the fridge at least 2 hours before smoking it to ensure it sits well at room temperature. Depending on what flavor you want for your smoked brisket, you can choose among the following woods:
Woods
- Cherry and apple woodchips- Add a mild, sweet flavor
- Hickory woodchips- Add a hint of bacon
- Cherry woodchips with hickory- Balances out savory and sweet flavors
- Mesquite woodchips- Will give a jerky, lighter, and fresher flavor
If you peruse through the Masterbuilt electric smoker cooking instructions, you’ll learn that bettering your meat flavor can only be achieved by woodchips and not charcoal.
Step 4: Timing and Temperature
You will need to preheat the Masterbuilt electric digital smoker to 225 degrees Fahrenheit and set the interior temperature at 190 degrees Fahrenheit.
Stick the probe into the thickest part of your brisket and place it on the rack. Press start on the smoker’s controls.
When the interior chamber temperature hits 190 degrees Fahrenheit, the smoker will automatically stop cooking. It will turn on the warm mode to keep the brisket mellow until you’re ready to eat.
You can serve it with a pint of beer. You won’t believe just how much your friends will appreciate your cooking prowess!